Now that we’ve covered how to assign oxidation numbers and how to balance redox reactions…
How to Teach Balancing Redox Reactions Using Oxidation Numbers
Last week, we introduced techniques for teaching online chemistry students how to assign oxidation numbers to elements. Once students are comfortable with oxidation numbers, the next step is to teach them how to balance redox reactions using the oxidation number method.
This approach builds directly on what students already know and helps them see electron transfer rather than memorizing steps blindly. For online chemistry teachers, this method is easy to model step by step on a shared screen.
When should students use the oxidation number method?
The oxidation number method works best for reactions that are not in acidic or basic solutions, or when half-equations feel too advanced (we’ll cover the half-equation method next week!). It works for both molecular and ionic equations and is a great way to introduce balancing redox reactions.
The oxidation number method is an excellent bridge between identifying redox reactions and learning the more formal half-equation method later on.
Big Picture Idea (Tell Students This First)
Before jumping into the steps of balancing redox reactions using the oxidation number method, tell students this main idea:
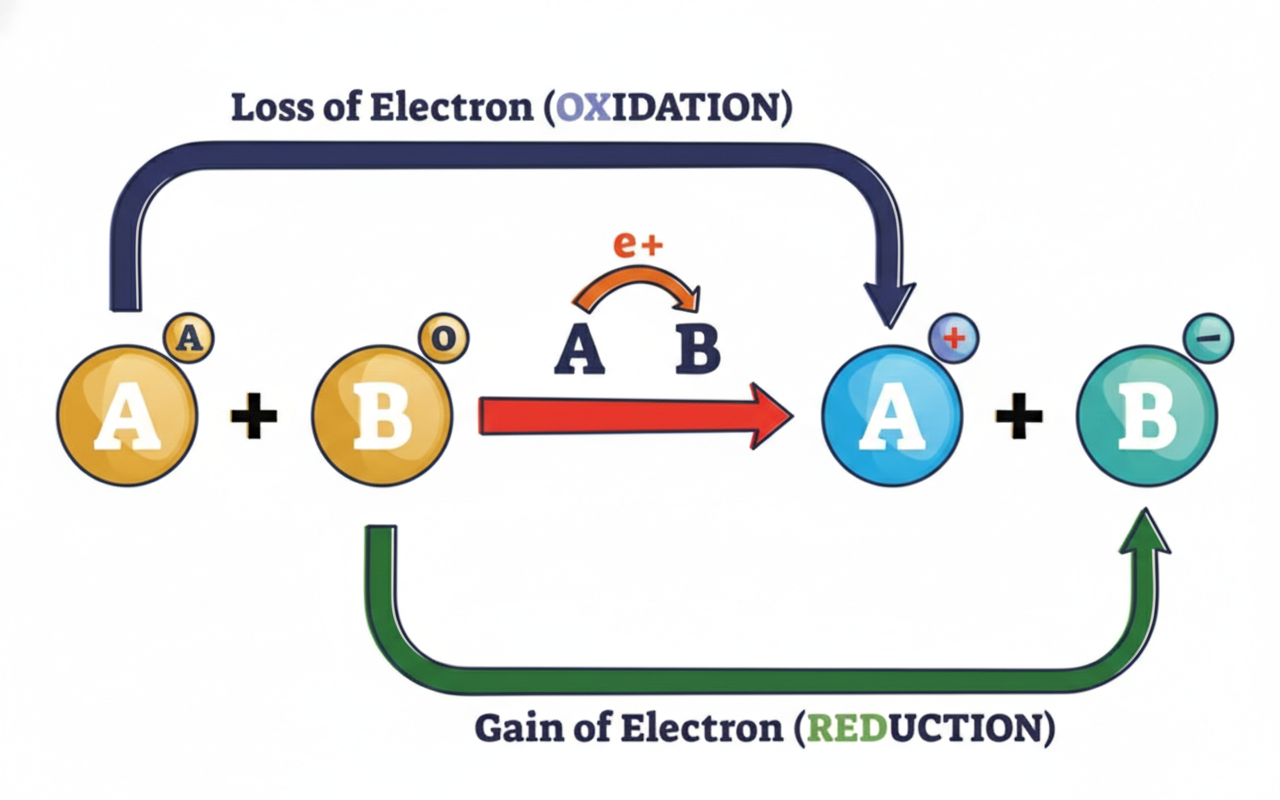
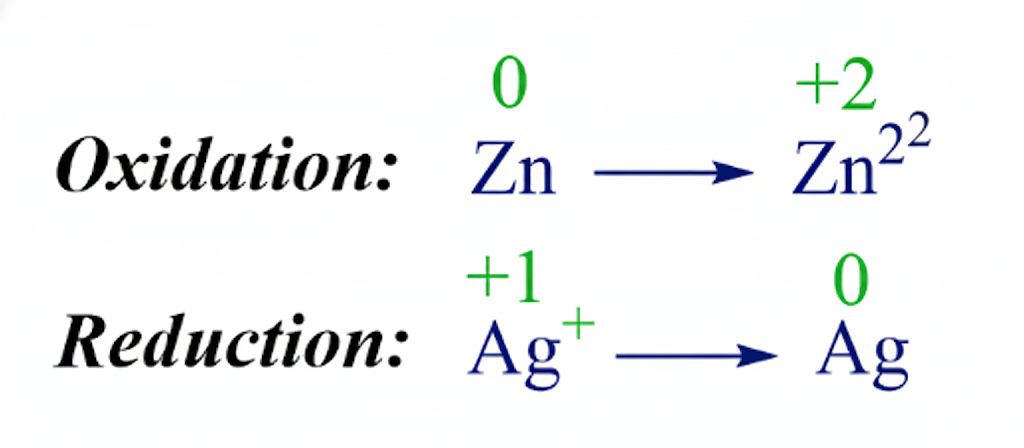
In a balanced redox reaction, the total increase in oxidation number must equal the total decrease in oxidation number.
This is because the number of electrons lost must equal the number of electrons gained. Electrons don’t just appear out of nowhere or disappear into the abyss. Encourage students to keep this rule in mind as they balance equations.
Step-by-Step: Oxidation Number Method
Teach this as a fixed routine students can follow every time.
Step 1: Write the unbalanced equation
Start with the skeletal (unbalanced) equation.
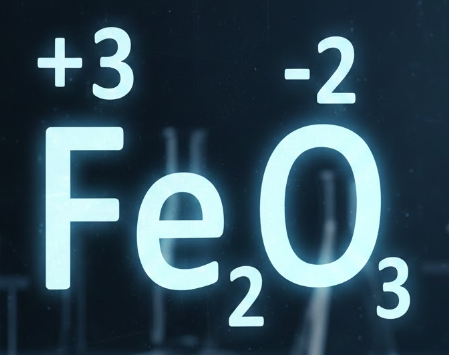
Example: Fe + O2 → Fe2O3

(Fun fact: Fe2O3 is rust.)
Step 2: Assign oxidation numbers
Assign oxidation numbers to every element in the equation.
- Fe (elemental) = 0
- O2 (elementa) = 0
- Fe in Fe2O3 = +3
- O in Fe2O3 = -2
(This is where prior oxidation-number practice really pays off.)
Step 3: Identify oxidation and reduction
Compare oxidation numbers before and after the reaction.
- Fe: 0 → +3 → oxidation (increase)
- O: 0 → -2 → reduction (decrease)
Remind students:
- Oxidation number (state) increases → oxidation
- Oxidation number (state) decreases → reduction
Step 4: Calculate total increase and decrease

Now comes the key balancing logic.
In Fe2O3:
- Each Fe atom increases by +3
- There are 2 Fe atoms → total increase = +6
- Each O atom decreases by -2
- There are 3 O atoms → total decrease = -6
Because electrons lost must equal electrons gained, the redox portion is already balanced within the compound.
Step 5: Balance using coefficients
Now balance atoms using coefficients to these oxidation changes match across the whole equation.
Balanced equation: 4Fe + 3O2 → 2Fe2O3
Quick check:
- 4 Fe atoms: each loses 3 electrons → total loss = 12
- 6 O atoms: each gains 2 electrons → total gain = 12
Redox is balanced.

Step 6: Do a final check
Have students verify:
- All atoms are balanced
- Charges (if present) are balanced
- Total oxidation number increases equal total decreases
Encourage this habit early, as it helps prevent careless mistakes.
In chemistry, students simply need plenty of practice to build confidence and accuracy. Once they are comfortable with oxidation numbers and the oxidation number method, they will be ready to move on to more advanced redoxing balancing techniques.
Next week, we’ll cover the half-equation method for balancing redox reactions!
Related Posts